

Are you overwhelmed by too many emails in your inbox? Microsoft Outlook has a solution: Search Outlook by Date. This easy tool is perfect for anyone with a lot of emails. It helps busy workers, students, and anyone wanting a tidy inbox. Learn to use Search Outlook by Date and find your important emails fast. This saves time and makes you more productive.
Using Search Outlook by Date makes dealing with emails simple. You can find an old work email or a special photo from last year. This feature helps you take control of your emails. To get the best out of it, learn how to search on different devices like computers and smartphones. Start using these easy steps and your Outlook inbox will be well-organized.
Learning How to Search Outlook by Date on the Web
If you want to handle your emails better in Microsoft Outlook Web, it’s great to learn how to Search Outlook by Date. This skill helps you find emails from a certain time, especially when you have many emails. First, go to the Outlook website and log in. This is important for getting into your mailbox and using Outlook’s search features.
How to Use Date Filters for Searching
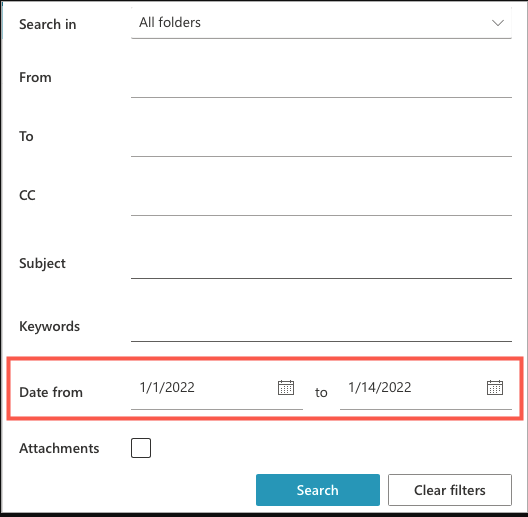
Using date filters is key in the Search Outlook by Date process. Here’s how: Open Outlook and find the Search box at the top. Click ‘All’ in this box to choose where you want to search – like a specific folder. Then, click the arrow on the right of the Search box to see more options.
In the filter menu, look for the ‘Date From’ option. Here, you can type in the start and end dates for when you want to find emails. Outlook also has a handy calendar for picking dates. Go ahead and click the calendar icons.
Finalizing Your Search Results:
After you set the dates, you can narrow down your search even more. Add things like keywords, who sent the email, or the subject. When you’re happy with your search, click ‘Search’. Outlook will then show all the emails that fit what you’re looking for, from the dates you chose. This makes organizing your emails easier and saves you time. By getting good at the Search Outlook by Date feature in Outlook on the web, you can make managing your emails much smoother and faster.
You might also find these articles interesting: How to Keep Teams Status Green When Away: Stay ‘Active’
How to Search for Emails by Date in Microsoft Outlook on Windows
Using Microsoft Outlook on Windows? You can find emails when they are sent or received with the “Search Outlook by Date” feature. It’s easy and flexible for your needs. Here’s a simple guide:
1. Using the Search Box:
- First, go to the search box at the top of your Outlook window. This is where you start your email search.
- If you want to search in a different mailbox or a special folder, use the “Current Mailbox” dropdown menu. This lets you switch where you’re searching without any hassle.
- For more search options, click the filter icon in the search box. This shows you different ways to narrow down your search.
2. Choosing the Date Range:
- Find the “Received” field in the filter options. This is where you set the start and end dates for your search.
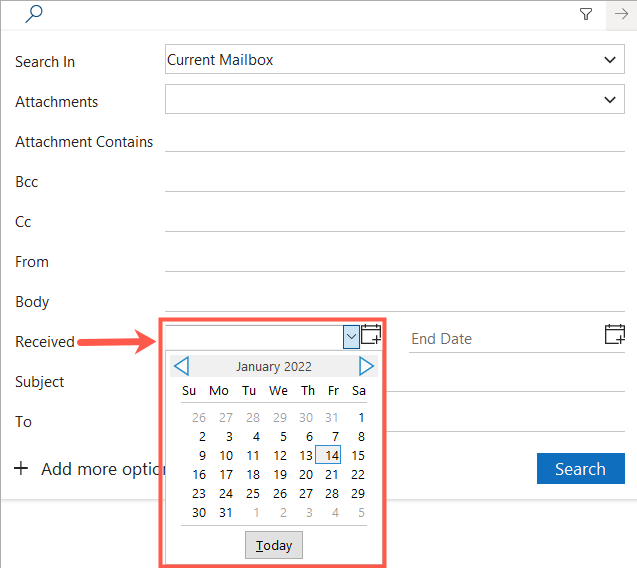
- You can type the dates or use the pop-up calendars for an easier way to choose dates. Then click the arrow next to the date fields.
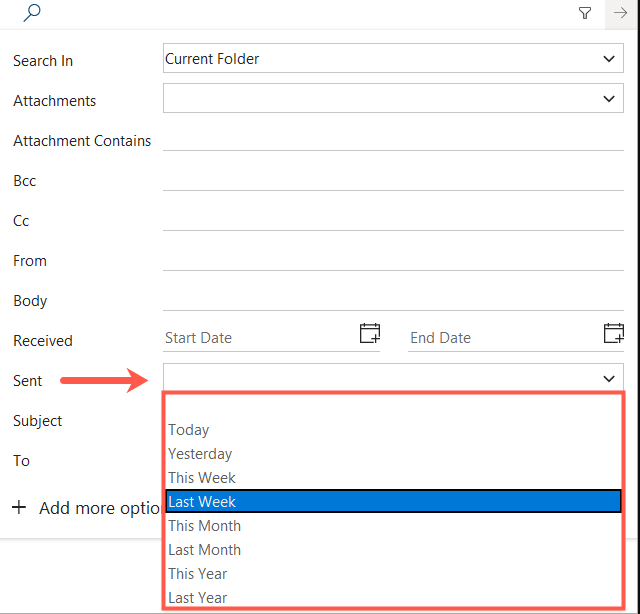
- If you’re looking for emails you sent, use the “Sent” dropdown menu. It has quick choices like “Today” or “Last Week,” and you can also pick a custom date range.
3. Adding Extra Search Criteria:
- For even better search results, add more details like the sender’s name, keywords, or the subject line.
- Each detail you add helps to find exactly what you’re looking for.
- Once you’re done setting your search, click the “Search” button.
After you search, Outlook will show all the emails that fit your date range and other details. This makes it easy to manage your emails and saves you time. “Search Outlook by Date” is a great tool for anyone using Outlook on Windows.
Continue exploring: Fixing ‘WiFi Doesn’t Have a Valid IP Configuration’ in Windows
Search Outlook Emails by Date on Mac
If you want to search for emails by date in Outlook on Mac, it’s easy whether you use the classic or new version. This guide will show you how to use the ‘Search Outlook by Date’ feature to find your emails.
For Classic Outlook on Mac:
- Starting a Search: Click in the Search field at the top. This opens the Search tab where you can choose your search options.
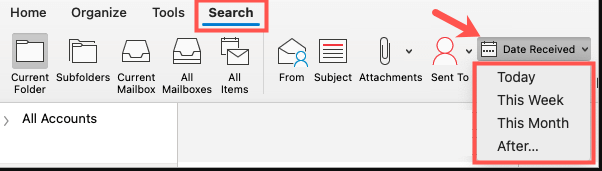
- Quick Date Search: Use ‘Date Received’ or ‘Date Sent’ to find emails from times like “Today, This Week, or This Month”.
- Custom Date Range: For a specific search, pick ‘After’ in the Date menu and enter a start date. This shows emails after that date. To add an end date, click the plus sign, choose ‘Before, ‘ and then put in your end date. This helps you search emails between two dates. This is specific to the Classic Legacy Outlook on Mac. You can revert to the legacy Outlook at your discretion.

For the New Outlook on Mac:
- Using the Search Box: The new version starts with the Search box at the top, like in Windows and web versions. You can choose a specific mailbox or folder to search in if you want.
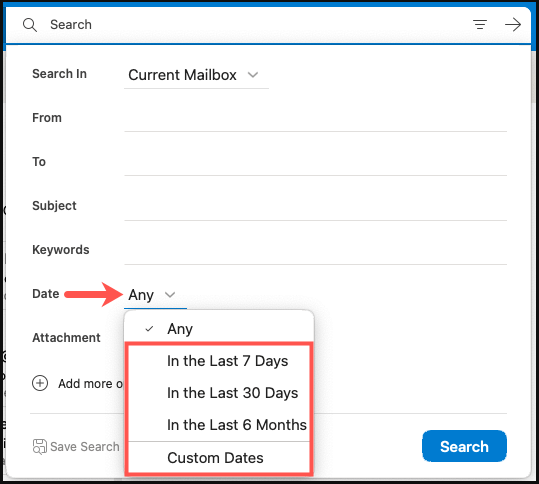
- Date Filters: Click the filter icon and go to the ‘Date’ section. Here, you can pick from ready-made date ranges like the last seven or 30 days or the past six months.
- Custom Date Searches: If you need a special date range, select ‘Custom Dates’. You can type in start and end dates or pick them using the calendar icons. This is great for searching emails from a specific time that isn’t covered by the preset options.
Both these methods in Outlook on Mac make it easy to find your emails by date. They work well for all kinds of email searches, whether you’re using the classic or new version of Outlook.
Performing an Instant Search in Outlook
Outlook makes it easy to find your emails quickly. If you need to look at emails from a certain day or a range of dates, use the instant search feature. This is helpful when you have a lot of emails and need to find specific ones fast.
1. How to Use Quick Search Commands in Outlook
To Search Outlook by Date, start by typing what you need in the search bar in Outlook, whether on computer or online. Here’s how to do it:
- Finding Emails from a Certain Day: Type something like received:today or received:yesterday in the search bar. This is a quick way to see emails from days that you usually need to check.
- Looking for Emails from a Specific Period: If you need to find emails from a certain time frame, type in the dates like this: received:12/1/2021..1/1/2022. This shows you all the emails from December 1, 2021, to January 1, 2022. You can change these dates to any range you need.
- Using Different Date Formats: Don’t worry about how you write the dates. Whether you type received:2021/12/1..2022/1/1 or received:12/1/2021, Outlook will understand and find your emails.

2. Finding Sent Emails by Date
You can also search for emails you’ve sent by date. Likewise, replace received with sent in your search. For example, sent:12/1/2021..1/1/2022 will show you all the emails you sent between those dates.
These quick search tips make managing your emails in Outlook much easier and faster. It’s helpful for people who get a lot of emails and need to find specific ones without wasting time.

Other articles that might interest you: Killer Network Service Explained: Is It Essential for Gamers?
Final Remarks
In conclusion, learning how to search Outlook by date makes managing your emails much easier and quicker. Whether you’re dealing with work emails or trying to keep personal emails organized. To make things simpler, use the date filter feature. For example, if you need an email from last Tuesday, don’t waste time scrolling through all your emails. Just set the filter to that date, and you’ll find it fast. This way, handling your emails becomes easy and less of a hassle.
Also, don’t forget about the quick search commands in Outlook. Commands like ‘received:today‘ or ‘sent:last week‘ are big time-savers. They help you find what you need in no time. Try using these shortcuts every day, and you’ll get your email tasks done faster. The “Search Outlook by Date” feature works well on the web, Windows, and Mac. It’s designed to be easy to use and helpful. Start using these tools, and you’ll manage your emails better. This means you’ll spend less time on emails and more on other important work.